> ## Documentation Index
> Fetch the complete documentation index at: https://help.gorelo.io/llms.txt
> Use this file to discover all available pages before exploring further.
# Approve and invoice
> Review and approve time entries and products in Gorelo before they flow onto a contract or invoice, then bill clients accurately for all completed work.
## Time entries and products
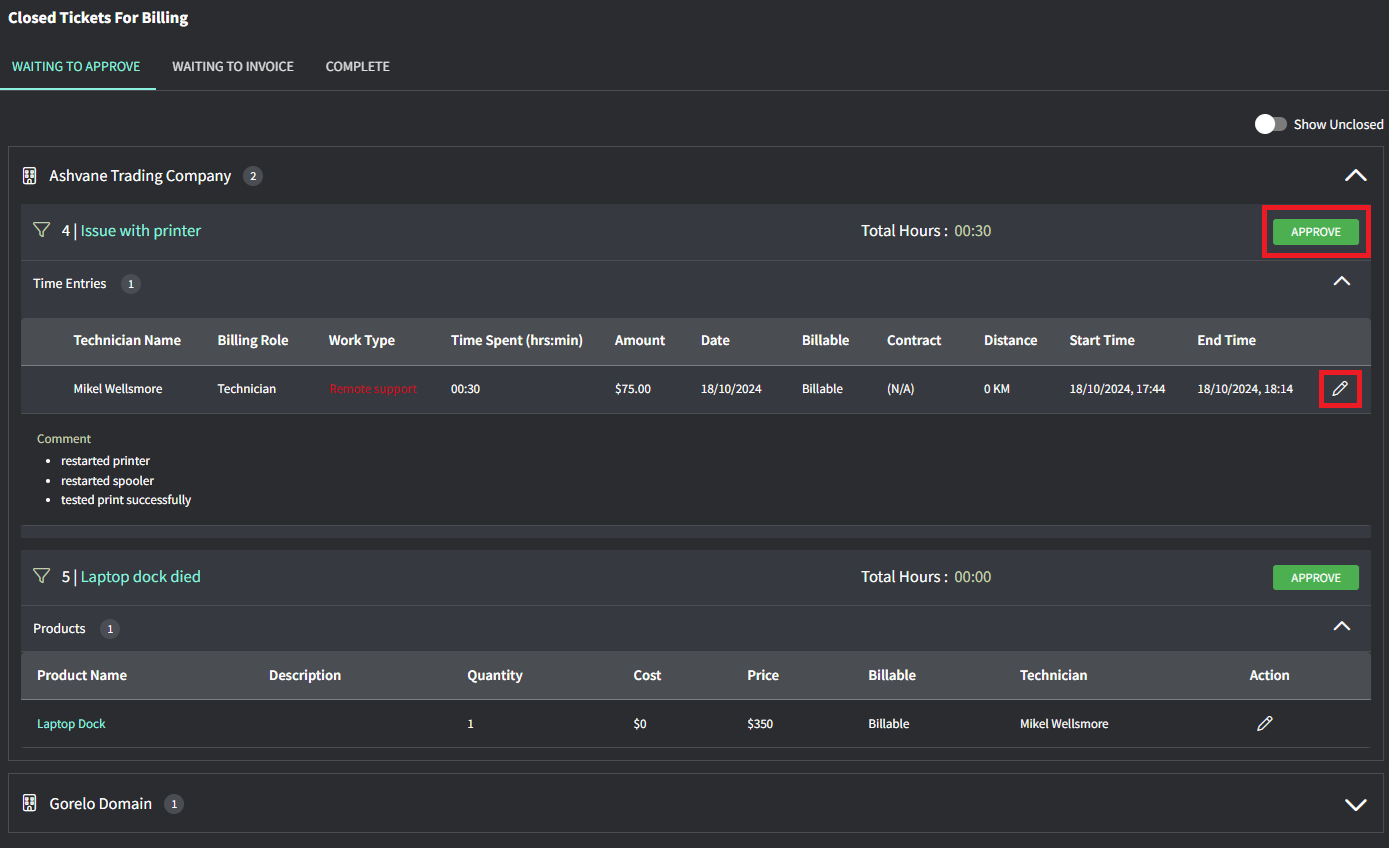
You will land on the ‘Waiting to Approve’ tab and will see everything that requires approval before flowing through to the contract or onto an invoice.
After that, click **Approve** when you’re happy with everything on the ticket.
Tips!
* The **Contract** column will show **(N/A)** if it’s not associated with a contract and is just using default labor rates.
* The Work Type will show in red if the time entry is outside of your configured Business Hours.
* You can partially bill for time and products on Unclosed tickets by toggling on ‘Show Unclosed’ up the top-right of the **Waiting to Approve** screen.
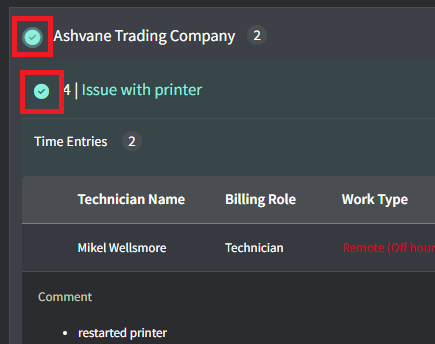
You will see everything that has been approved and is waiting to be added to an invoice.
Choose either:
* individual tickets
* all tickets for a client
Use it to:
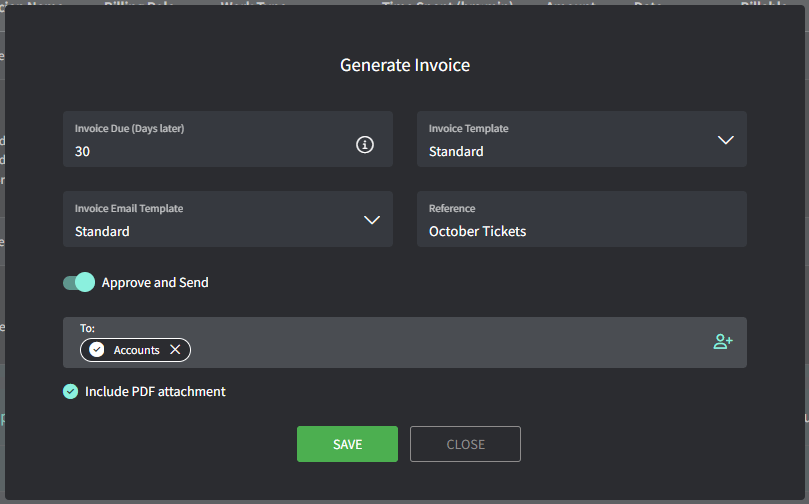
* **Generate Invoice**: this will create a new invoice with the selected ticket time/products.
* **Add to Invoice**: this will allow you to select an existing invoice and add the selected ticket time/products.
* **Write off**: this will write off the ticket time/products and no invoice will be generated.
Fill in the details and either:
* Click **Save** to generate a draft invoice.
* Toggle **Approve and Send** if you’d like to create an approved invoice and send to the selected contact.
To send an invoice, the client must have **Billing Contacts** set. If this isn't set, you can add one from the invoice:
1. On the invoice, click the client’s name
2. From the **Location** table, click the **three dots** icon and then click **Edit location**.
3. In the **Billing Contacts** field, select an existing contact or add a new one.
4. Save and go back to your invoice to send it.