> ## Documentation Index
> Fetch the complete documentation index at: https://help.gorelo.io/llms.txt
> Use this file to discover all available pages before exploring further.
# ScreenConnect integration
> Integrate ScreenConnect with Gorelo for one-click remote desktop sessions and agent installation, with Instance ID, API path, and credential configuration.
Gorelo integrates with ScreenConnect for one-click Remote Desktop connections and agent installation.
1. Navigate to **Settings** > **[Integrations](https://app.gorelo.io/Admin/admin-settings#integrations).**
2. Click the ⚙️**cog** icon to configure **ScreenConnect.**
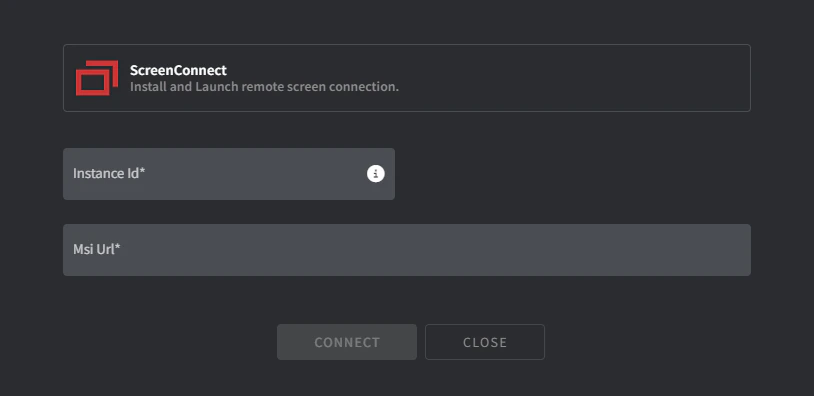 3. Fill in the required fields:
* **Instance ID**
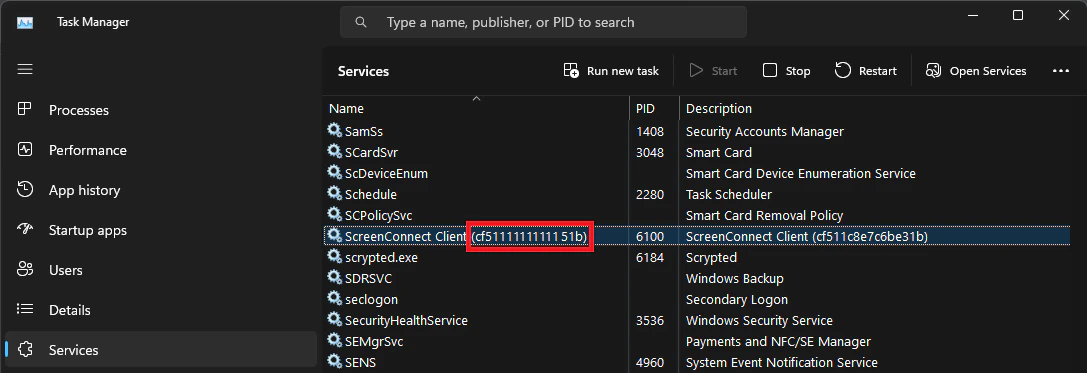
1. Access one of your endpoints that already has your ScreenConnect Client installed.
2. Navigate to **Services**.
3. Copy the value of the ScreenConnect Client Service in parentheses:
3. Fill in the required fields:
* **Instance ID**
1. Access one of your endpoints that already has your ScreenConnect Client installed.
2. Navigate to **Services**.
3. Copy the value of the ScreenConnect Client Service in parentheses:
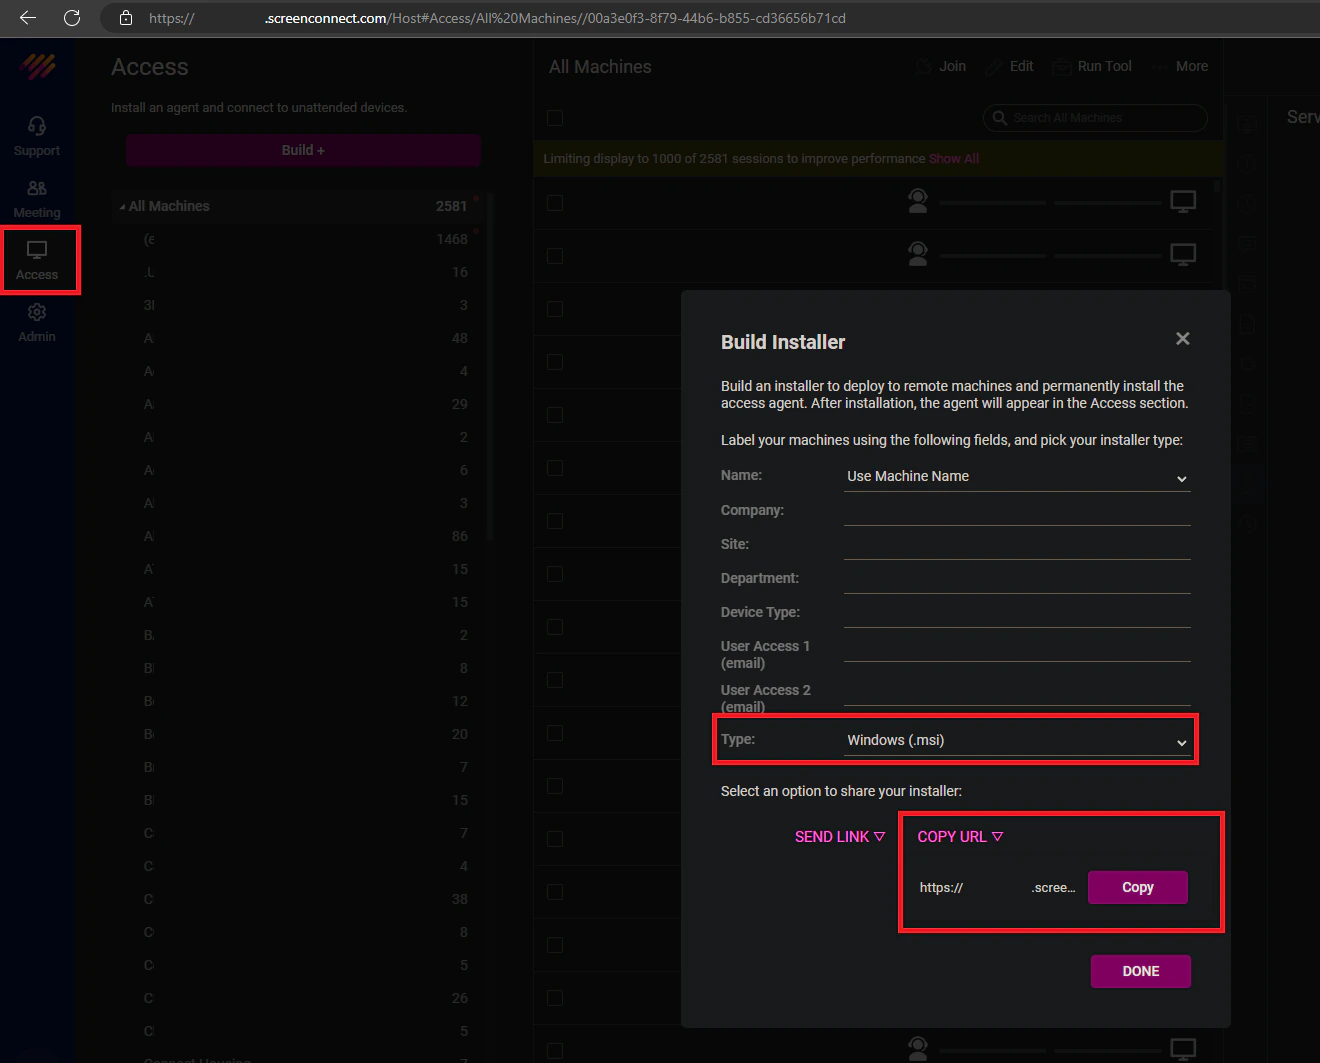
 * **MSI URL**
1. Log in to your ScreenConnect tenant.
2. Click **Access.**
3. Click **Build.**
4. Change type to **Windows (MSI).**
5. Click **copy URL.**
* **MSI URL**
1. Log in to your ScreenConnect tenant.
2. Click **Access.**
3. Click **Build.**
4. Change type to **Windows (MSI).**
5. Click **copy URL.**
 4. Click **Connect.**
Gorelo automatically inserts the client name into the ScreenConnect company field on install. See Step 3 for additional configuration.
1. Navigate to [Policies](https://app.gorelo.io/Asset/policy-management) in the main menu.
2. Add the ScreenConnect plugin to an existing policy or create a new one.
3. Click **Distribute.**
**Tips!**
See the [Policies](/how-policies-work) guide for additional information.
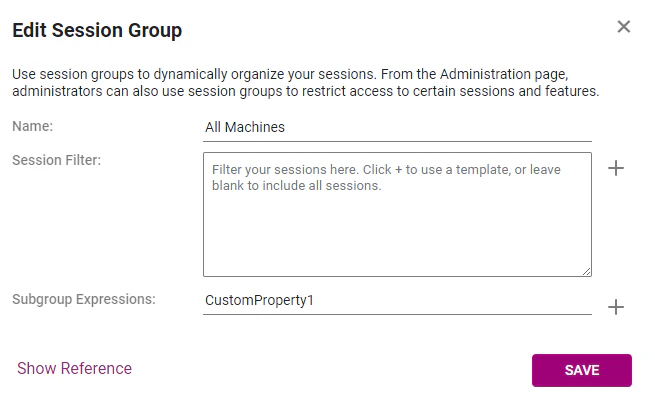
1. Log in to your ScreenConnect tenant.
2. Navigate to **Access**.
3. Click the **3-dot menu** on the **All Machines** session group and click **Edit.**
4. Enter `CustomProperty1` in the **Subgroup Expressions** field.
5. Click **Save.**
4. Click **Connect.**
Gorelo automatically inserts the client name into the ScreenConnect company field on install. See Step 3 for additional configuration.
1. Navigate to [Policies](https://app.gorelo.io/Asset/policy-management) in the main menu.
2. Add the ScreenConnect plugin to an existing policy or create a new one.
3. Click **Distribute.**
**Tips!**
See the [Policies](/how-policies-work) guide for additional information.
1. Log in to your ScreenConnect tenant.
2. Navigate to **Access**.
3. Click the **3-dot menu** on the **All Machines** session group and click **Edit.**
4. Enter `CustomProperty1` in the **Subgroup Expressions** field.
5. Click **Save.**
 ## Troubleshooting
### ScreenConnect is not connecting on a specific asset
If ScreenConnect doesn't show a connection on a specific asset, reinstall it by following these steps:
1. Navigate to the details page of the specific asset.
2. Click the **Policy** tab down the bottom-left:
## Troubleshooting
### ScreenConnect is not connecting on a specific asset
If ScreenConnect doesn't show a connection on a specific asset, reinstall it by following these steps:
1. Navigate to the details page of the specific asset.
2. Click the **Policy** tab down the bottom-left:
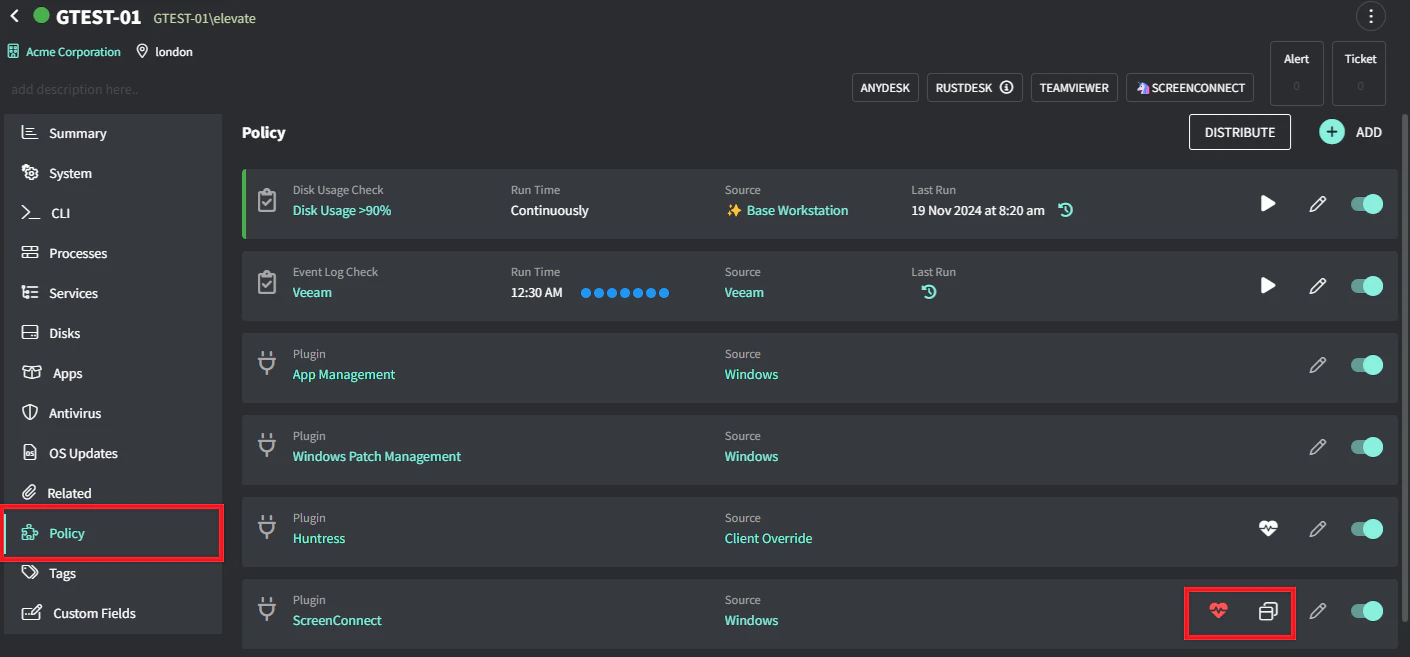 3. Click the heart icon on the ScreenConnect plugin.
4. Click the ScreenConnect icon to reinstall.
3. Click the heart icon on the ScreenConnect plugin.
4. Click the ScreenConnect icon to reinstall.