Documents
Written By Mikel from Gorelo
In Gorelo, we have two types of documents — Unstructured and Structured.
Unstructured documents are what you’re used to — a free flowing document like Word or Notion. This is great for documenting a ‘how to’ guide but not the best fit for something where very specific information needs to be captured,
Structured documents are a bit different — they’re based on forms. You essentially build out a form that asks for the specific information you want to capture. You then fill this form for each entry you want to add E.g. each printer, network rack, application and more.
Create an Unstructured Document
Navigate to Documents in the main menu
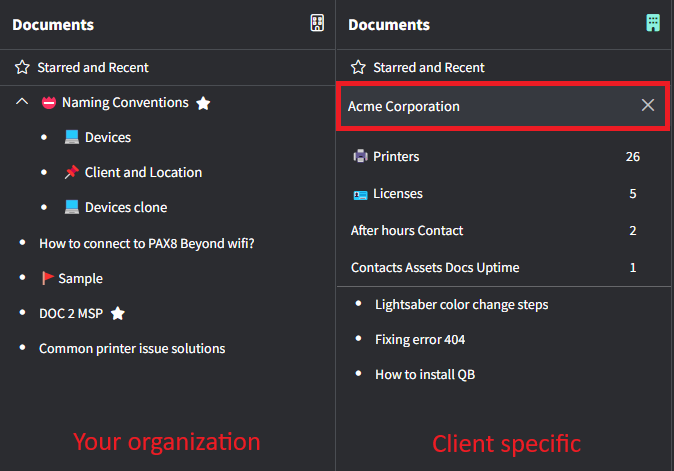
(These are your internal organization documents and do not belong to any specific client)
Click ‘Create a document’ down the bottom-left to create a new top-level document
Give the document a title
Add content to the document by typing whatever you want
Or add a block by typing forward slash ‘/’ E.g. formatting, code, table, image carousel etc.Click ‘Save’ up the top-right
Tips!
Nested documents can be created via the 3-dot menu on each document
A blank document with nested documents will display the nested documents in a list
Formatting text as a heading will then display the heading in the contents bar on the far right
Drag-and-drop attachments directly onto the document while editing to upload (they appear in the bottom-left of the document)
The 3-dot menu
The 3-dot menu allows for extra functionality. This can be accessed via the hover 3-dot in the document list or via the 3-dot menu on the far-right of each document.
Star: this allows you to star your favorite documents for easier access
New nested document: this creates a new nested document below your selection
Copy link: this copies a direct link to this document for use in Teams etc. (user must have access to Gorelo to use this)
Duplicate: this duplicates the current document and places it at the same level
Move: this allows you to move a document anywhere in Gorelo (including to other Clients)
Archive: this archives the document (accessible via the Archive button down the bottom left)
Open in new tab: this open the document in a new Gorelo tab
Restore previous version: this allows you to see previous version history and restore
Make public: this publishes the document to the Client Portal
(your organization documents will be published to the portal for ALL clients, documents under specific clients will only be published to the portal for that specific client)
Client Focus and Documents
The client Focus works a little bit differently on Documents. When there is no Client Focus set, the documents you see belong to your internal organization. When you set a Client Focus, the documents you see belong to that specific client.
Create a Structured Document
A structured document comes in two parts — the structured document template and the entries it generates. We’ll first need to create a template before we can generate entries from it.
Structured Document Template
Navigate to Settings —> Documents
Click ‘Create structured document’ down the bottom-left
Give the Structured Document a title (this will be used as the name in the left-menu and supports emojis)
Build out your structured document template with question/answer fields by typing ‘/’ to or clicking the + button on hover
Select the fields you’d like to show in the list of entries
Select a field you’d like to use as the title of the entry
Click ‘Save’ up the top-right
Tips!
The Question name becomes to the title of the column
The little star in the top-right corner of the field will make it a required field
Assets/Contacts/Documents/Uptime fields will allow you to select existing items for the associated client
Conditional Logic allows you to show/hide fields
The 3-dot menu allows you to restore previous versions of the structured document template
Structured Document Entry
Navigate to Documents in the main menu
Set your Client Focus
Select your Structured Document title from the left-menu E.g. Licenses in the screenshot below
Click ‘New’ to create an entry
Fill in the required fields and click ‘Save’
You will now see a new entry in the list
