- Cove
- SentinelOne
- BitDefender
- Webroot
- Cove
- SentinelOne
- BitDefender
- Webroot
创建客户自定义字段。
- 导航到 Settings > CRM > Custom Fields。
- 添加自定义字段,详细信息如下:
- Name:Cove Customer UID
- Variable:CoverCustomerUID
为每个客户填写 Cove Customer UID。
- 导航到特定客户。
- 点击 Custom Fields。
- 编辑 Cove Customer UID。
- 输入从 Cove 检索到的 Customer UID。
编写脚本。
- 导航到 Scripts。
- 创建一个脚本,详细信息如下:
- Name:Install-Cove
- Content:
# ===== Configuration Variables =====
$CUSTOMERUID = $gorelo:client.CoveCustomerUID
$PROFILEID = "All-in" # Default retention policy
$PRODUCT = "0" # Profile ID (use "0" for no profile or a specific profile ID)
$DOWNLOADPATH = "C:\Windows\Temp"
# ===================================

$startTime = Get-Date
$INSTALL = "$DOWNLOADPATH\bm#$CUSTOMERUID#$PROFILEID#.exe"

# Download installer
try {
    [Net.ServicePointManager]::SecurityProtocol = [Net.SecurityProtocolType]::Tls12
    (New-Object System.Net.WebClient).DownloadFile("https://cdn.cloudbackup.management/maxdownloads/mxb-windows-x86_x64.exe", "$INSTALL")
} catch {
    Write-Output "ERROR: Failed to download installer - $_"
    exit 1
}

# Run installer
try {
    Start-Process -FilePath $INSTALL -ArgumentList "-product-name `"$PRODUCT`"" -Wait -NoNewWindow
    Start-Sleep -Seconds 5
} catch {
    Write-Output "ERROR: Installation failed - $_"
    exit 1
}

# Verify installation
$service = Get-Service -Name "Backup Service Controller" -ErrorAction SilentlyContinue
$process = Get-Process -Name "BackupFP" -ErrorAction SilentlyContinue

if ($service.Status -eq 'Running' -and $process) {
    Write-Output "SUCCESS: Backup Service Controller is running and BackupFP process is active."
    Write-Output "Installed for Customer UID: $CUSTOMERUID"
    $exitCode = 0
} else {
    Write-Output "WARNING: Backup Service Controller or BackupFP process is not running as expected."
    Write-Output "Customer UID: $CUSTOMERUID"

    # Check log for errors
    $logDirectory = "C:\ProgramData\mxb\Backup Manager\logs\ClientTool"
    if (Test-Path $logDirectory) {
        $latestLog = Get-ChildItem -Path $logDirectory -Filter "*.log" | Sort-Object LastWriteTime -Descending | Select-Object -First 1
        if ($latestLog) {
            $errorLines = Get-Content -Path $latestLog.FullName | Where-Object { $_ -match '\[E\]' } | Select-Object -Last 3
            if ($errorLines) {
                Write-Output "Recent errors from log:"
                $errorLines | ForEach-Object { Write-Output $_ }
            }
        }
    }
    $exitCode = 1
}

$endTime = Get-Date
Write-Output "Installation completed in $([math]::Round(($endTime - $startTime).TotalSeconds, 2)) seconds."
exit $exitCode
创建客户自定义字段。
- 导航到 Settings > CRM > Custom Fields:
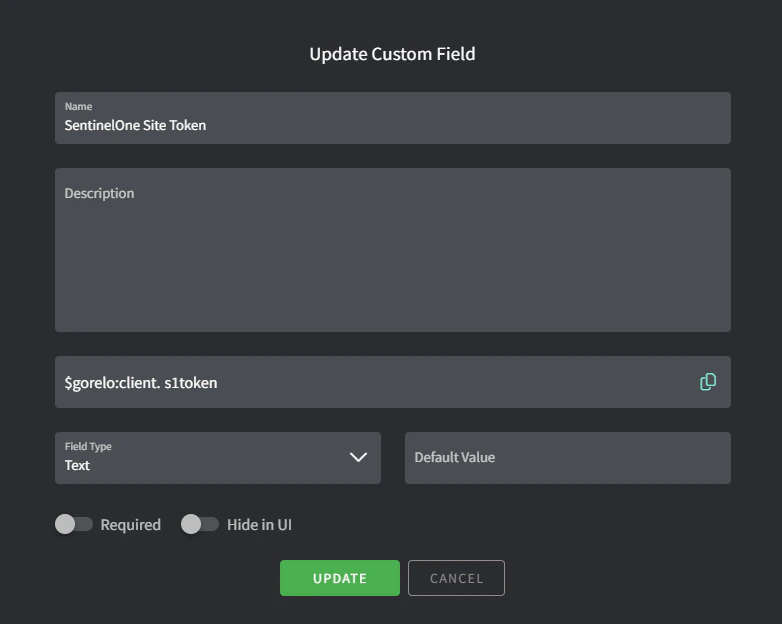
- 添加自定义字段,详细信息如下:
- Name:SentinelOne Site Token
- Variable:s1token
为每个客户填写软件令牌。
- 导航到特定客户
- 点击 Custom Fields。
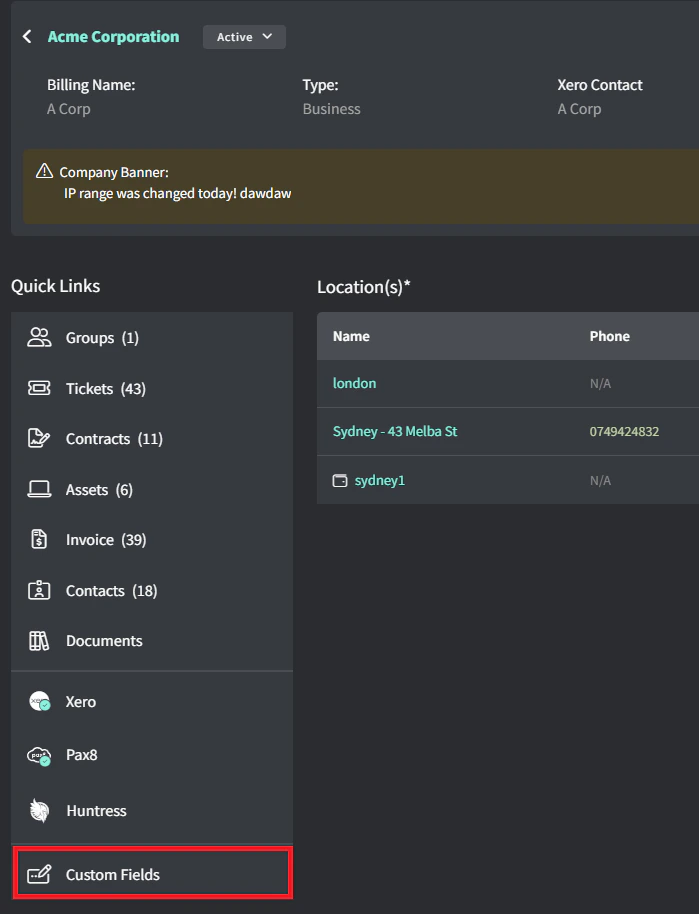
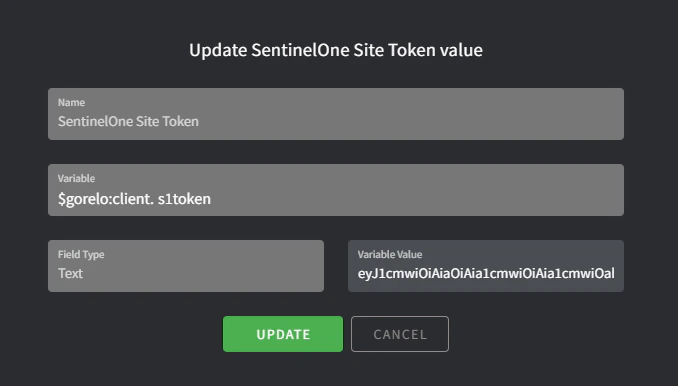
- 编辑 SentinelOne Site Token。
- 输入从 SentinelOne 检索到的 Site Token。
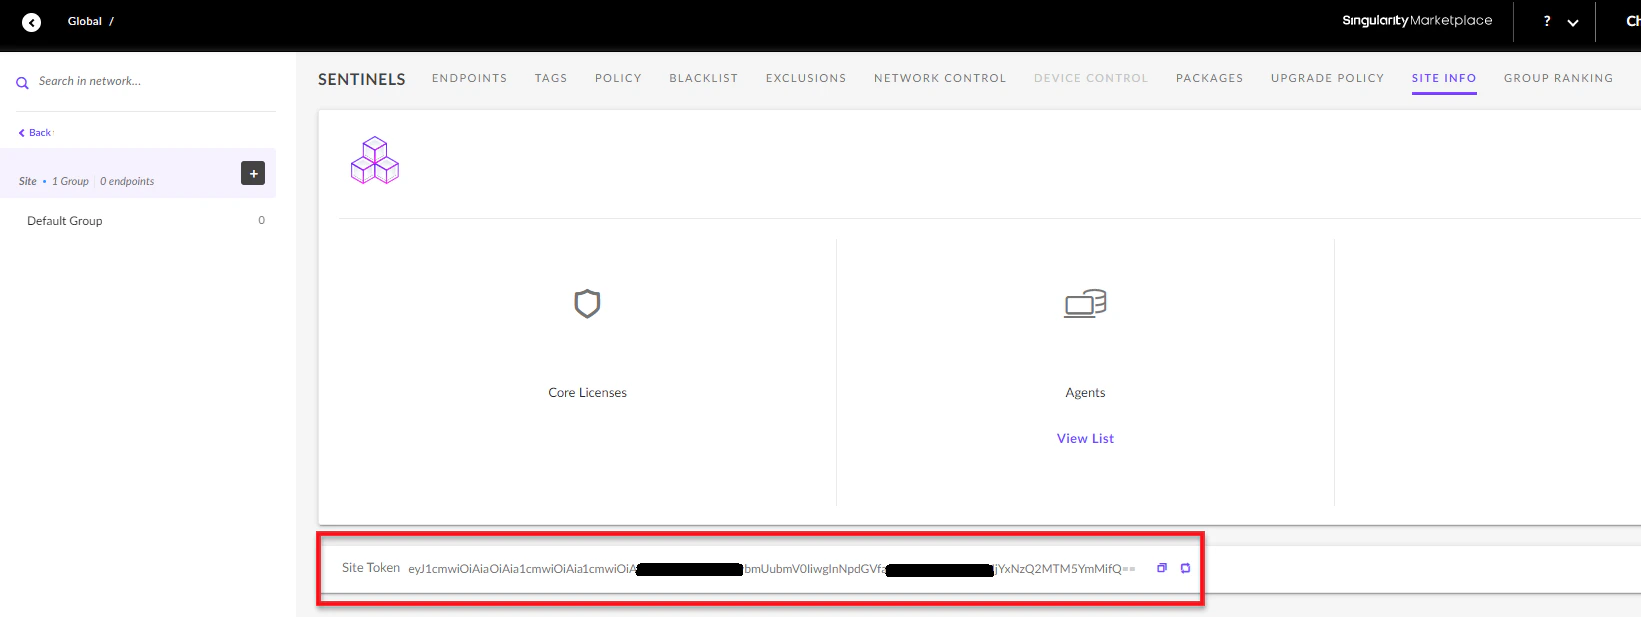
你可以从 https://<DomainName>.sentinelone.net/dashboard 检索你的 SentinelOne Site Token。导航到一个站点,然后转到 Site Info 选项卡。
创建安装程序文件。
- 导航到 Settings > Asset > Files。
- 添加一个文件,详细信息如下:
- File:上传最新的 MSI 安装程序
- Variable:S1Installer
编写脚本。
- 导航到 Scripts。
- 创建一个脚本,详细信息如下:
- Name:Install-SentineOne。
- Content:
#Silently install SentinelOne

if($gorelo:client.s1token){

  $S1Service = get-service -Name 'Sentinel Agent' -ErrorAction SilentlyContinue

  if($S1Service -eq $null){

        msiexec /i $gorelo:file.S1Installer SITE_TOKEN=$gorelo:client.s1token /quiet /norestart

  }
}
通过策略部署脚本。
- 导航到 Policies。
- 编辑覆盖你想要安装 SentinelOne 的资产的现有策略。
- 添加 Install-SentineOne 脚本并设置为每天在你偏好的时间重复运行。
- 分发策略。
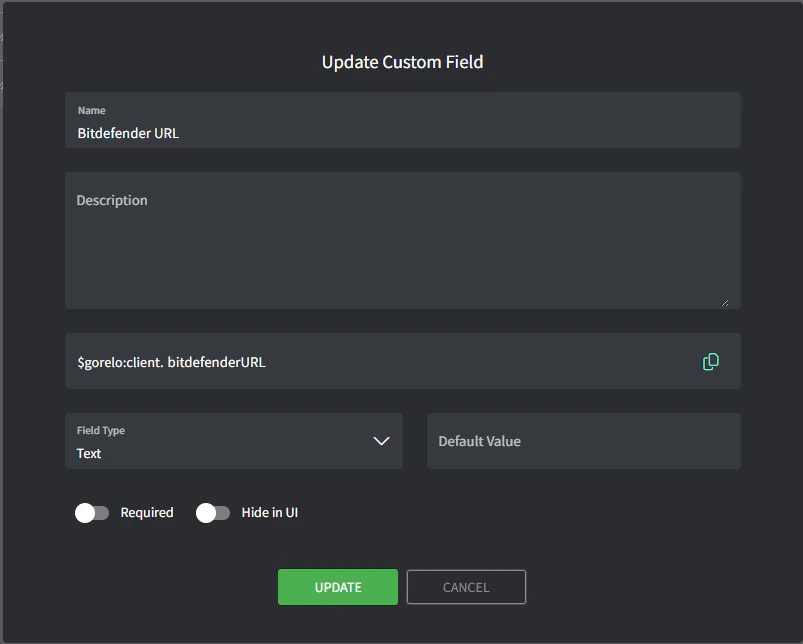
创建客户自定义字段。
- 导航到 Settings > CRM > Custom Fields。
- 添加自定义字段,详细信息如下:
- Name:Bitdefender URL
- Variable:bitdefenderURL
为每个客户填写 BitDefender URL。
- 导航到特定客户。
- 点击 Custom Fields。

- 编辑 Bitdefender URL。
- 为每个客户输入从 Bitdefender 检索到的安装 exe URL。
 Bitdefender 安装 exe 的 URL 应类似如下(虚构示例):
htttps://cloudgz.gravityzone.bitdefender.com/Packages/BSTWIN/0/setupdownloader_[aHR0cHM6Ly9jbG91ZGdLWDawWVjcy5ncR5em9uZS5iaXRkZWZl3ddwawGfawdmRlci5jb20vUGFja2FnZXMvQlNUV0lOLzAvdkluc3RhbGxlci54bw-bGFuZz1lbi1VUw==].exe
编写脚本。
- 导航到 Scripts。
- 创建一个脚本,详细信息如下:
- Name:Install-Bitdefender
- Content:
#$gorelo:client.bitdefenderURL

# Check if Bitdefender is already installed
if (Get-Service -Name "EPProtectedService" -ErrorAction SilentlyContinue) {
    Write-Host "Bitdefender is already installed. Skipping installation."
    exit 0
}

# Proceed with installation
$url = $gorelo:client.bitdefenderURL
$filename = Split-Path $url -Leaf
$installer = Join-Path $env:TEMP $filename

Write-Host "Downloading Bitdefender installer..."
(New-Object System.Net.WebClient).DownloadFile($url, $installer)

Write-Host "Installing Bitdefender..."
Start-Process -FilePath $installer -ArgumentList "/silent" -Wait
Remove-Item -LiteralPath $installer

# Verify installation
Start-Sleep -Seconds 10  # Give the service time to start
$service = Get-Service -Name "EPProtectedService" -ErrorAction SilentlyContinue

if ($service -and $service.Status -eq "Running") {
    Write-Host "Installation successful! EPProtectedService is running."
    exit 0
} else {
    Write-Host "Installation may have failed. EPProtectedService not found or not running."
    exit 1
}
通过策略部署脚本。
- 导航到 Policies。
- 编辑覆盖你想要安装 Bitdefender 的资产的现有策略。
- 添加 Install-Bitdefender 脚本并设置为每天在你偏好的时间重复运行。
- 分发策略。
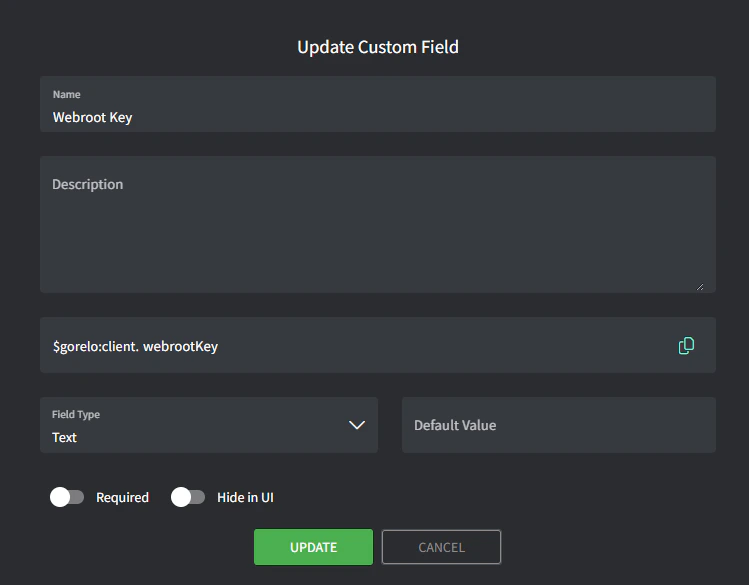
创建客户自定义字段。
- 导航到 Settings > CRM > Custom Fields。
- 添加自定义字段,详细信息如下:
- Name:Webroot Key
- Variable:webrootKey
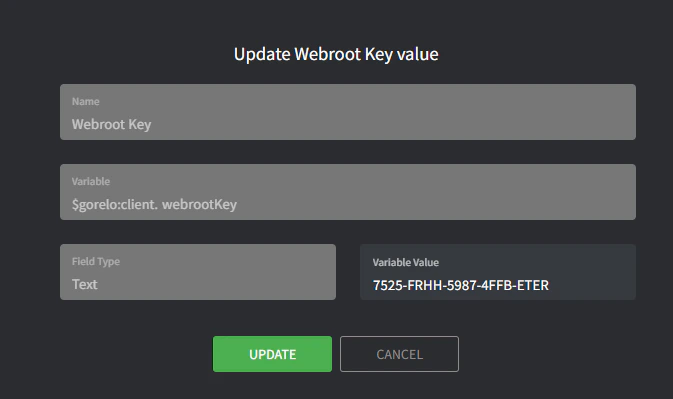
为每个客户填写 Webroot 密钥。
- 导航到特定客户。
- 点击 Custom Fields。

- 编辑 Webroot Key。
- 输入**从 Webroot 检索到的** Webroot Key。
创建安装程序文件。
- 导航到 Settings > Asset > Files。
- 添加一个文件,详细信息如下:
- File:上传最新的 MSI 安装程序
- Variable:webrootInstaller
创建脚本。
- 导航到 Scripts。
- 创建一个脚本,详细信息如下:
- Name:Install-Webroot
- Content:
# Silently install Webroot
if($gorelo:client.webrootKey){
    $WebrootService = Get-Service -Name 'WRSVC' -ErrorAction SilentlyContinue
    if($WebrootService -eq $null){
        msiexec /i $gorelo:file.webrootInstaller GUILIC=$gorelo:client.webrootKey CMDLINE=SME,quiet /qn /l*v install.log
    }
}
通过策略部署脚本
- 导航到 Policies。
- 编辑覆盖你想要安装 Webroot 的资产的现有策略。
- 添加 Install-Webroot 脚本并设置为每天在你偏好的时间重复运行。
- 分发策略。