- Cove
- SentinelOne
- BitDefender
- Webroot
- Cove
- SentinelOne
- BitDefender
- Webroot
Créez le champ personnalisé de client.
- Allez à Paramètres > CRM > Champs personnalisés.
- Ajoutez un champ personnalisé avec les détails suivants :
- Nom : Cove Customer UID
- Variable : CoverCustomerUID
Renseignez le Cove Customer UID pour chaque client.
- Allez à un client spécifique.
- Cliquez sur Champs personnalisés.
- Modifiez Cove Customer UID.
- Saisissez le Customer UID récupéré depuis Cove.
Écrivez le script.
- Allez à Scripts.
- Créez un script avec les détails suivants :
- Nom : Install-Cove
- Contenu :
# ===== Configuration Variables =====
$CUSTOMERUID = $gorelo:client.CoveCustomerUID
$PROFILEID = "All-in" # Default retention policy
$PRODUCT = "0" # Profile ID (use "0" for no profile or a specific profile ID)
$DOWNLOADPATH = "C:\Windows\Temp"
# ===================================

$startTime = Get-Date
$INSTALL = "$DOWNLOADPATH\bm#$CUSTOMERUID#$PROFILEID#.exe"

# Download installer
try {
    [Net.ServicePointManager]::SecurityProtocol = [Net.SecurityProtocolType]::Tls12
    (New-Object System.Net.WebClient).DownloadFile("https://cdn.cloudbackup.management/maxdownloads/mxb-windows-x86_x64.exe", "$INSTALL")
} catch {
    Write-Output "ERROR: Failed to download installer - $_"
    exit 1
}

# Run installer
try {
    Start-Process -FilePath $INSTALL -ArgumentList "-product-name `"$PRODUCT`"" -Wait -NoNewWindow
    Start-Sleep -Seconds 5
} catch {
    Write-Output "ERROR: Installation failed - $_"
    exit 1
}

# Verify installation
$service = Get-Service -Name "Backup Service Controller" -ErrorAction SilentlyContinue
$process = Get-Process -Name "BackupFP" -ErrorAction SilentlyContinue

if ($service.Status -eq 'Running' -and $process) {
    Write-Output "SUCCESS: Backup Service Controller is running and BackupFP process is active."
    Write-Output "Installed for Customer UID: $CUSTOMERUID"
    $exitCode = 0
} else {
    Write-Output "WARNING: Backup Service Controller or BackupFP process is not running as expected."
    Write-Output "Customer UID: $CUSTOMERUID"

    # Check log for errors
    $logDirectory = "C:\ProgramData\mxb\Backup Manager\logs\ClientTool"
    if (Test-Path $logDirectory) {
        $latestLog = Get-ChildItem -Path $logDirectory -Filter "*.log" | Sort-Object LastWriteTime -Descending | Select-Object -First 1
        if ($latestLog) {
            $errorLines = Get-Content -Path $latestLog.FullName | Where-Object { $_ -match '\[E\]' } | Select-Object -Last 3
            if ($errorLines) {
                Write-Output "Recent errors from log:"
                $errorLines | ForEach-Object { Write-Output $_ }
            }
        }
    }
    $exitCode = 1
}

$endTime = Get-Date
Write-Output "Installation completed in $([math]::Round(($endTime - $startTime).TotalSeconds, 2)) seconds."
exit $exitCode
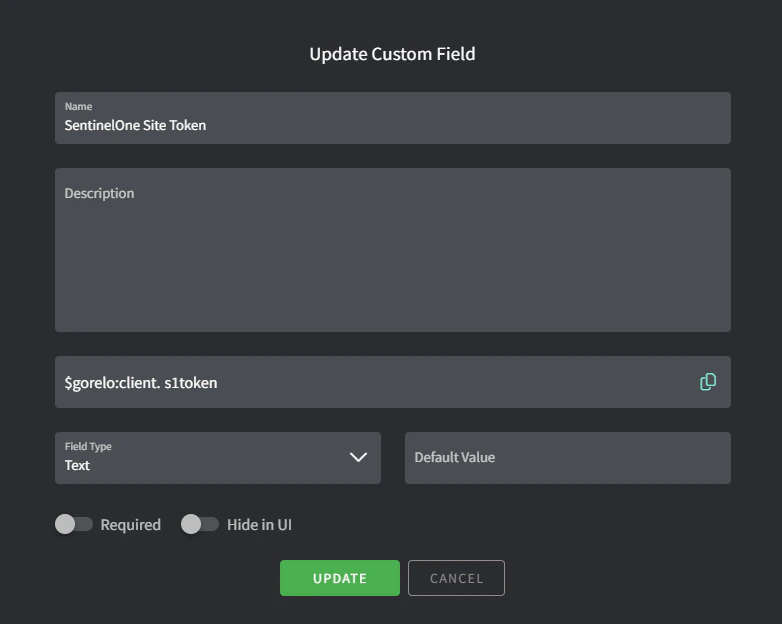
Créez le champ personnalisé de client.
- Allez à Paramètres > CRM > Champs personnalisés :
- Ajoutez un champ personnalisé avec les détails suivants :
- Nom : SentinelOne Site Token
- Variable : s1token
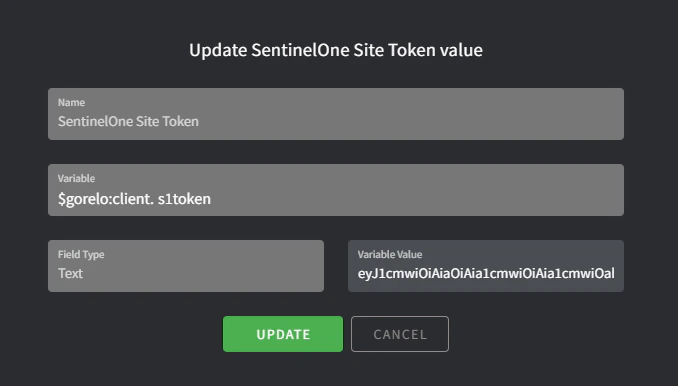
Renseignez le jeton logiciel pour chaque client.
- Allez à un client spécifique.
- Cliquez sur Champs personnalisés.
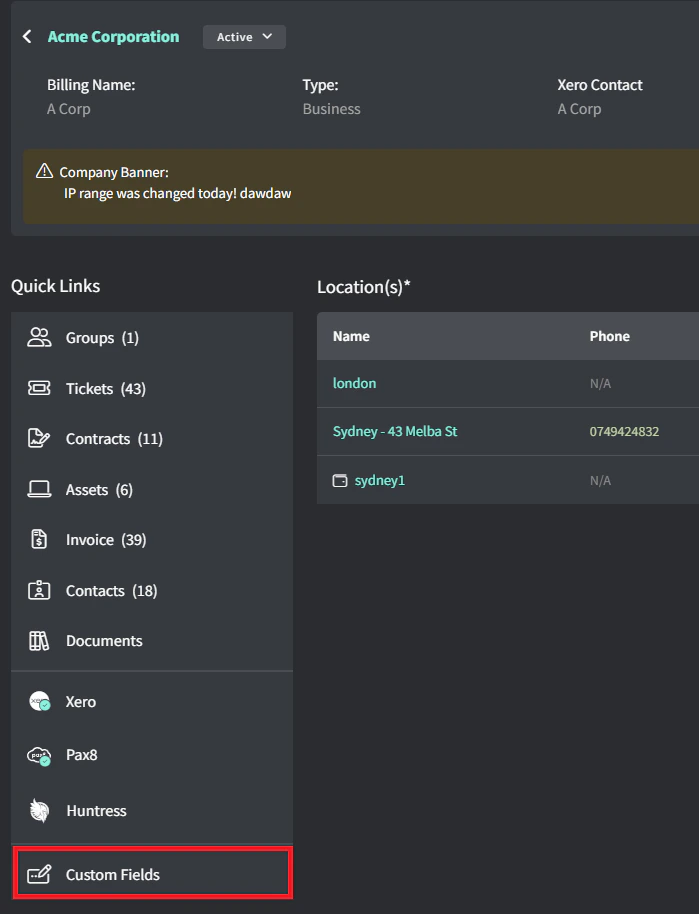
- Modifiez SentinelOne Site Token.
- Saisissez le Site Token récupéré depuis SentinelOne.
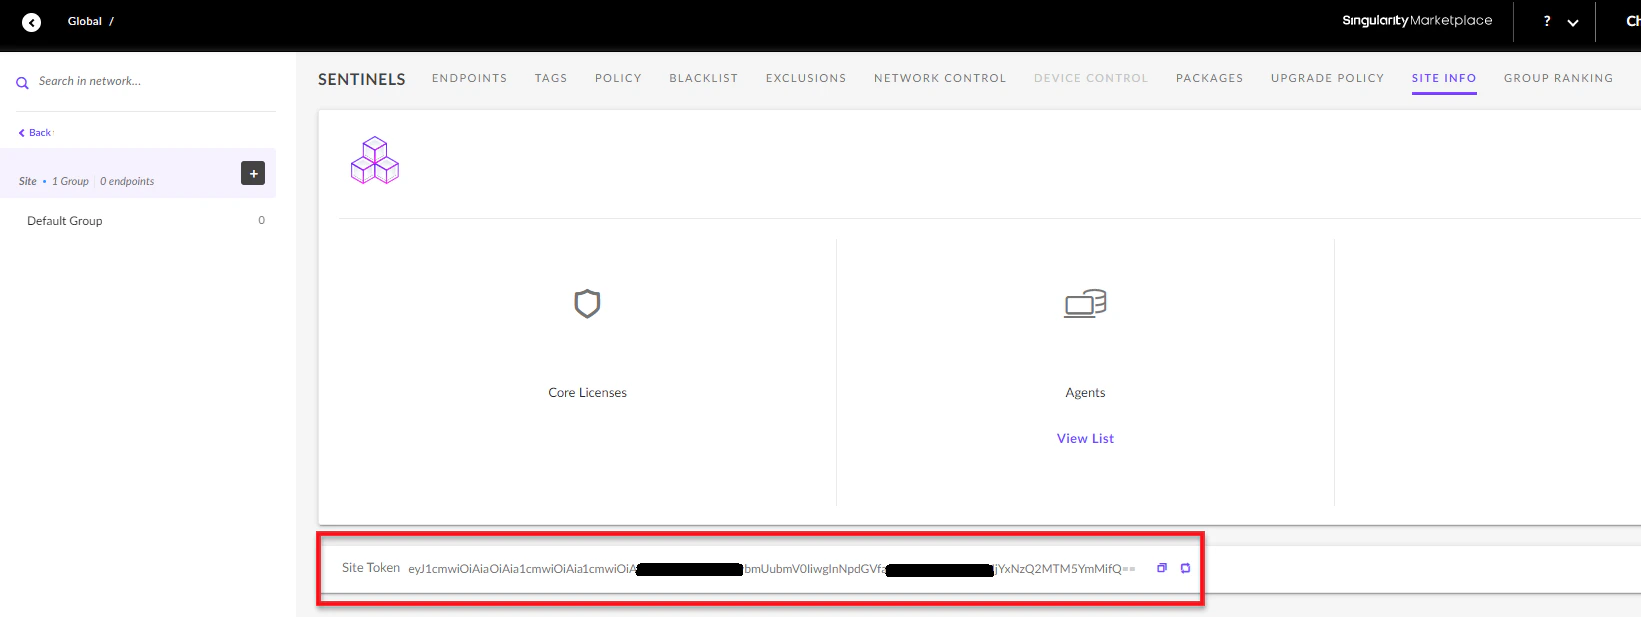
Vous pouvez récupérer votre SentinelOne Site Token depuis https://<NomDuDomaine>.sentinelone.net/dashboard. Allez à un site, puis à l’onglet Site Info.
Créez le fichier d'installation.
- Allez à Paramètres > Actif > Fichiers.
- Ajoutez un fichier avec les détails suivants :
- Fichier : téléversez le dernier installeur MSI.
- Variable : S1Installer
Écrivez le script.
- Allez à Scripts.
- Créez un script avec les détails suivants :
- Nom : Install-SentineOne.
- Contenu :
#Silently install SentinelOne

if($gorelo:client.s1token){

  $S1Service = get-service -Name 'Sentinel Agent' -ErrorAction SilentlyContinue

  if($S1Service -eq $null){

        msiexec /i $gorelo:file.S1Installer SITE_TOKEN=$gorelo:client.s1token /quiet /norestart

  }
}
Déployez le script via une politique.
- Allez à Politiques.
- Modifiez une politique existante qui couvre les actifs sur lesquels vous voulez installer SentinelOne.
- Ajoutez le script Install-SentineOne et configurez-le pour qu’il se répète quotidiennement à l’heure de votre choix.
- Distribuez la politique.
Créez le champ personnalisé de client.
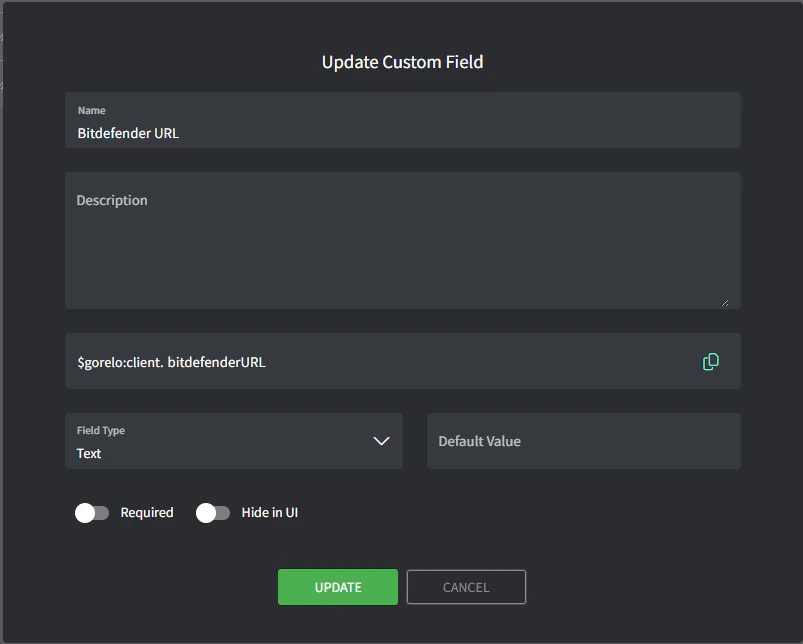
- Allez à Paramètres > CRM > Champs personnalisés.
- Ajoutez un champ personnalisé avec les détails suivants :
- Nom : Bitdefender URL
- Variable : bitdefenderURL
Renseignez l'URL BitDefender pour chaque client.
- Allez à un client spécifique.
- Cliquez sur Champs personnalisés.

- Modifiez Bitdefender URL.
- Saisissez l’URL de l’exécutable d’installation récupérée depuis Bitdefender pour chaque client.
 L’URL Bitdefender pour l’exécutable d’installation devrait ressembler à ceci (exemple fictif) :
htttps://cloudgz.gravityzone.bitdefender.com/Packages/BSTWIN/0/setupdownloader_[aHR0cHM6Ly9jbG91ZGdLWDawWVjcy5ncR5em9uZS5iaXRkZWZl3ddwawGfawdmRlci5jb20vUGFja2FnZXMvQlNUV0lOLzAvdkluc3RhbGxlci54bw-bGFuZz1lbi1VUw==].exe
Écrivez le script.
- Allez à Scripts.
- Créez un script avec les détails suivants :
- Nom : Install-Bitdefender
- Contenu :
#$gorelo:client.bitdefenderURL

# Check if Bitdefender is already installed
if (Get-Service -Name "EPProtectedService" -ErrorAction SilentlyContinue) {
    Write-Host "Bitdefender is already installed. Skipping installation."
    exit 0
}

# Proceed with installation
$url = $gorelo:client.bitdefenderURL
$filename = Split-Path $url -Leaf
$installer = Join-Path $env:TEMP $filename

Write-Host "Downloading Bitdefender installer..."
(New-Object System.Net.WebClient).DownloadFile($url, $installer)

Write-Host "Installing Bitdefender..."
Start-Process -FilePath $installer -ArgumentList "/silent" -Wait
Remove-Item -LiteralPath $installer

# Verify installation
Start-Sleep -Seconds 10  # Give the service time to start
$service = Get-Service -Name "EPProtectedService" -ErrorAction SilentlyContinue

if ($service -and $service.Status -eq "Running") {
    Write-Host "Installation successful! EPProtectedService is running."
    exit 0
} else {
    Write-Host "Installation may have failed. EPProtectedService not found or not running."
    exit 1
}
Déployez le script via une politique.
- Allez à Politiques.
- Modifiez une politique existante qui couvre les actifs sur lesquels vous voulez installer Bitdefender.
- Ajoutez le script Install-Bitdefender et configurez-le pour qu’il se répète quotidiennement à l’heure de votre choix.
- Distribuez la politique.
Créez le champ personnalisé de client.
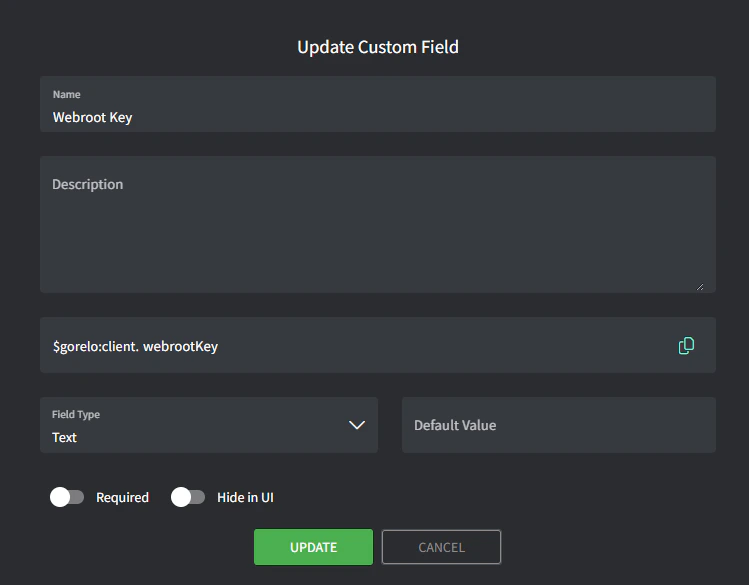
- Allez à Paramètres > CRM > Champs personnalisés.
- Ajoutez un champ personnalisé avec les détails suivants :
- Nom : Webroot Key
- Variable : webrootKey
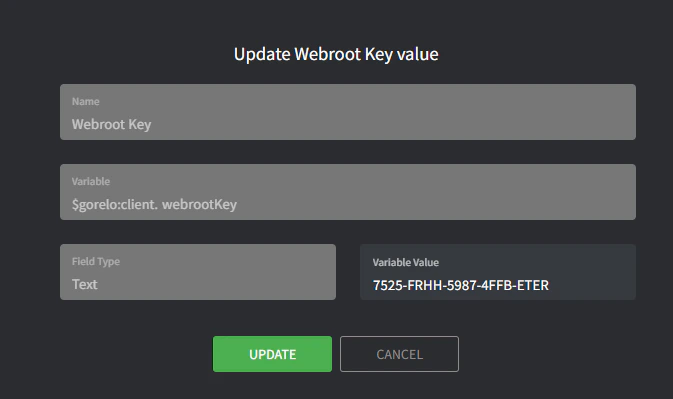
Renseignez la clé Webroot pour chaque client.
- Allez à un client spécifique.
- Cliquez sur Champs personnalisés.

- Modifiez Webroot Key.
- Saisissez la clé Webroot récupérée depuis Webroot.
Créez le fichier d'installation.
- Allez à Paramètres > Actif > Fichiers.
- Ajoutez un fichier avec les détails suivants :
- Fichier : téléversez le dernier installeur MSI.
- Variable : webrootInstaller
Créez le script.
- Allez à Scripts.
- Créez un script avec les détails suivants :
- Nom : Install-Webroot
- Contenu :
# Silently install Webroot
if($gorelo:client.webrootKey){
    $WebrootService = Get-Service -Name 'WRSVC' -ErrorAction SilentlyContinue
    if($WebrootService -eq $null){
        msiexec /i $gorelo:file.webrootInstaller GUILIC=$gorelo:client.webrootKey CMDLINE=SME,quiet /qn /l*v install.log
    }
}
Déployez le script via une politique
- Allez à Politiques.
- Modifiez une politique existante qui couvre les actifs sur lesquels vous voulez installer Webroot.
- Ajoutez le script Install-Webroot et configurez-le pour qu’il se répète quotidiennement à l’heure de votre choix.
- Distribuez la politique.