- Navigate to Settings —> Automation —> Scheduled Tickets
- Click ‘+Automation Rule’ in the top-right
- Enter the details you want on the resulting ticket:
- Title: this will be the title of the ticket
- Group: this will be the default assigned group and govern visibility/permissions
- Description: this will appear as a private comment on the ticket (optional)
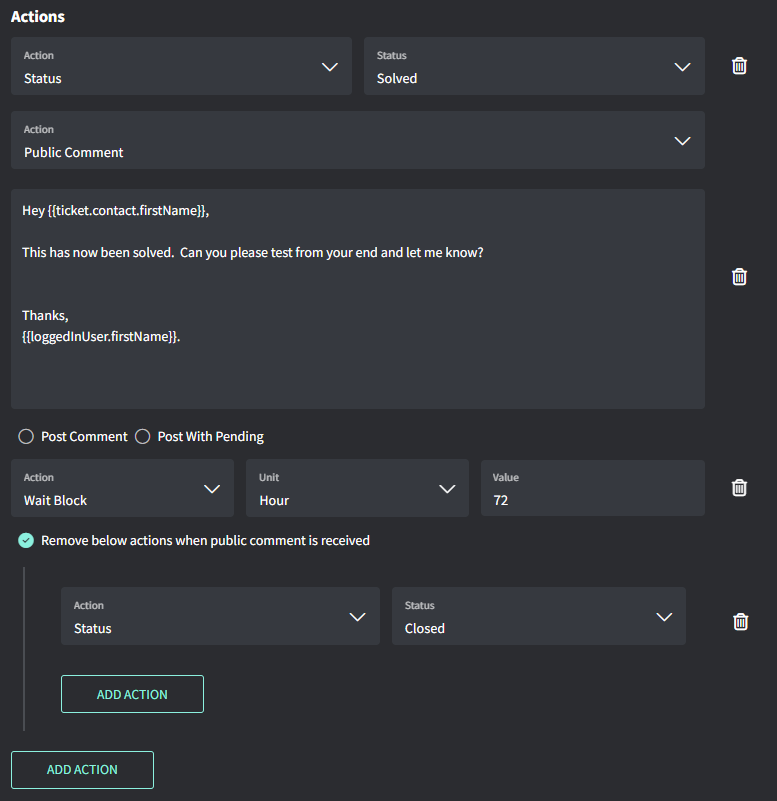
- Actions: these are additional actions such as assigning users, checklists, tags and more (optional)
- Client Selection: this allows you to select which clients the ticket will be automatically created for
- Schedule: this sets the cadence of either daily, weekly or monthly