Create a ticket shortcut
- Navigate to Settings —> Tickets —> Shortcuts
- Click ‘Add Shortcut’ up the top-right
- Fill in the necessary fields:
- Name: this is the name of the shortcut and will be used to search for it (on the Ticket Detail)
- Description: this is where you can describe the shortcut in extra detail. It will show when hovering the ℹ️ icon next to the name when searching for it (on the Ticket Detail)
- Visibility: this defines who can see/use the shortcut
- Public: everyone in your organization
- Private: only you
- Groups: only users in the specified groups
- Add the Actions (see examples below)
- Click ‘Create’
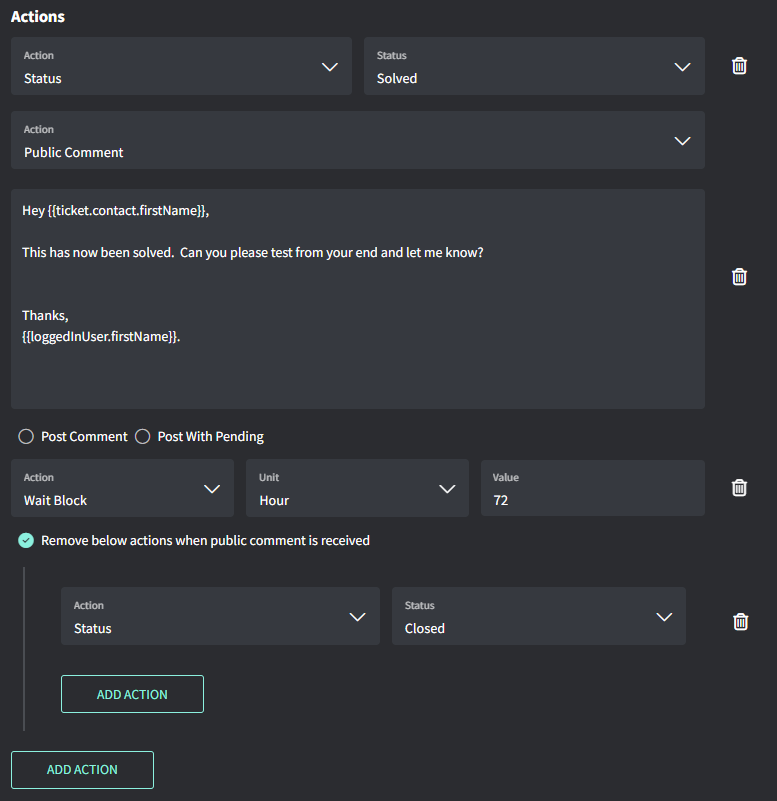
Example: solve and close a ticket
- Immediately mark as Solved
- Immediately insert public comment draft
- Wait 72 hours
- Mark as Closed (if no public comment reply was received)