Create and use checklists
- Navigate to a ticket
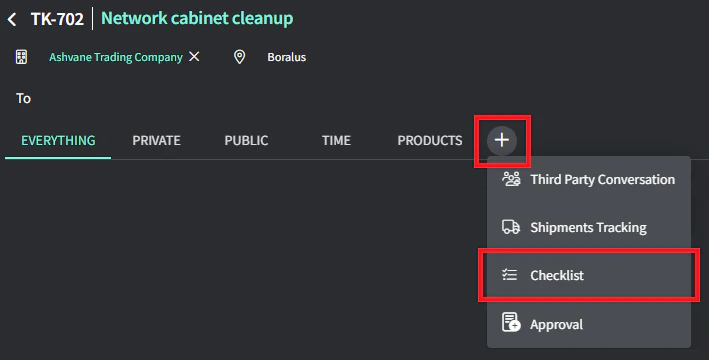
- Click the + button in the timeline tab and add a Checklist

- Modify the name (optional) and click Save
- You can now add checklist items:
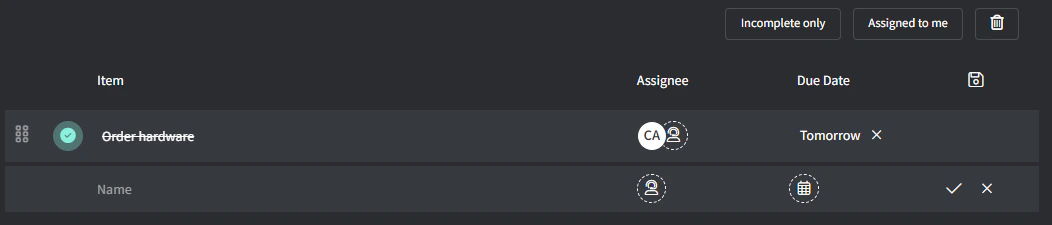
- Put your cursor in the Name field and type something, e.g., Order hardware
- Assign someone and set a due date (both optional)
-
Click the ✔️ button to add (or press Enter if your cursor is still in the Name field)
Create a checklist template
- Create a checklist (as per above) that you would like to save as a template
- Click the 💾 button (top-right) to save as a template
- Name: this is the name of the checklist template and it can be changed later, e.g., New Computer Setup
- Visibility: this determines who can see and use this template
- Public = everyone
- Private = only you
- Shortcut = only visible via Ticket Shortcuts
- Click Save
Use and edit checklist templates
- Create or navigate to an existing ticket
-
Click the + button in the timeline tab and add a Checklist
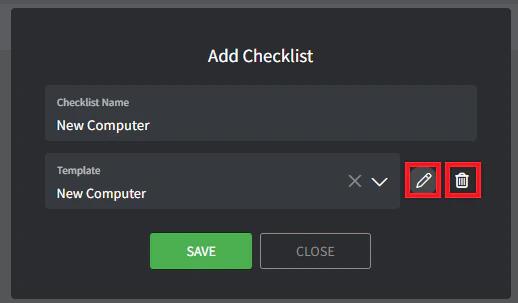
- From the Template dropdown, select the appropriate template
-
Use the Edit and Delete icons on the right
-
Checklist templates can be edited in many ways
- Name can be changed
- Order can be changed
- Items can be added/removed
- Assignees can be added/removed
- Relative due dates can be set, e.g., 7 days would mean the item is due 7 days after the checklist template was added to the ticket